Build It Yourself: The Ultimate Guide to Installing a Colorbond® Fence
Installing a Colorbond® fence can definitely be a DIY job, while it may be time-consuming you will end up saving a lot of money on installation.
If you’ve decided to install a Colorbond® fence, you’ve come to the right place.
In this blog, Tymlock will take you through installing a Colorbond® fence. Step-by-Step Installation Guide for Your Colorbond® Fence.
Now that you understand the features and benefits of Colorbond® fencing, let’s walk you through the installation process, but first here are some factors to keep in mind before installing a Colorbond® fence.
Essential Factors to Consider When Installing a Fence
Installing a fence might seem straightforward, but several crucial factors can impact its durability, functionality, and overall appearance. Whether you're putting up a Colorbond® fence for security, privacy, or aesthetics, keeping these key considerations in mind will ensure a smooth installation and a long-lasting, professional finish.
1. Planning & Regulations
Before you even think about digging post holes, take the time to check all legal and logistical aspects to avoid headaches down the line.
- Property Boundaries – The last thing you want is to accidentally install your fence on your neighbour’s property. Double-check boundary lines on official documents or get a professional survey done if necessary.
- Council Rules & Permits – Different areas have specific regulations regarding fence height, materials, and even colours. Some locations require council approval before installation, so check zoning laws beforehand.
- Shared Fences & Neighbor Agreements – If the fence sits on a shared boundary, it’s a good idea (and often legally required) to discuss the plans with your neighbour. This avoids disputes and may even lead to cost-sharing.
- Underground Utilities – Call your local utility services to locate water pipes, electrical cables, or gas lines before digging. Hitting a utility line can lead to costly repairs and safety hazards.
2. Defining the Purpose & Design
Not all fences serve the same function, so knowing exactly what you need from your fence will help determine the best materials, height, and style.
- Security & Protection – If safety is a priority, opt for a taller, solid fence with minimal gaps. Steel or reinforced fencing works best for added security.
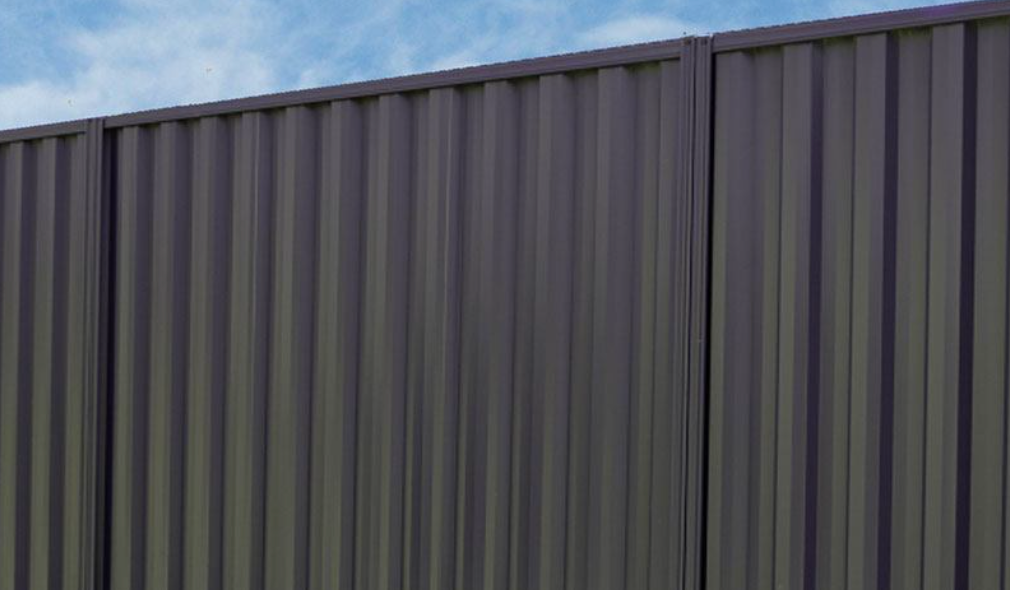
- Privacy Concerns – Want to block out nosy neighbours or street views? Choose panels with full coverage, like Colorbond® or timber slats, to ensure maximum privacy.
- Aesthetic Appeal – Your fence should complement your property’s style. Whether you prefer a sleek modern look (Colorbond®), a classic timber finish, or decorative panels, ensure it enhances curb appeal.
- Weather Considerations – In windy areas, opt for fencing with small gaps to allow airflow and prevent wind resistance. In hot climates, materials like Colorbond® reflect heat, keeping your backyard cooler.
- Noise Reduction – Live near a busy road or noisy neighbours? A thick, solid fence with noise-dampening properties can help reduce sound transmission.
3. Installation Techniques & Best Practices
Even the best materials won’t matter if the installation is flawed. Paying attention to these key construction details will help ensure a strong and level fence.
- Post Depth & Stability – Fence posts must be dug deep enough to provide stability. For a 1.8m fence, holes should be at least 600mm deep, ensuring the fence can withstand wind and ground movement.
- String Line & Leveling – Always use a string line and spirit level to keep everything straight. A crooked fence is not only unattractive but can weaken over time.
- Adjusting for Slopes – If your property isn’t completely level, decide whether to “step” the fence panels (creating a staircase effect) or install a sloped/raked fence that follows the natural incline.
- Concrete Setting Time – Use rapid-set concrete for quicker installation, but if time allows, standard concrete provides a stronger hold. Always allow proper curing time before applying force to the posts.
- Panel & Rail Securement – Ensure panels and rails are securely fastened to prevent rattling or movement during storms. The screws and brackets provide extra reinforcement.
4. Long-Term Considerations & Maintenance
A fence is an investment, so it’s worth thinking beyond the initial installation to how it will perform over time.
- Maintenance Requirements – Some fences (like Colorbond®and vinyl) require
minimal upkeep, while others (like timber) need regular staining, sealing, or painting.
Once you've considered these factors and are considering installing a Colorbond® fence by yourself, here is a step-by-step guideline on how to install a Colorbond®
Colorbond® Fence Installation Process
Step 1: Marking Out the Fence Line
The first step is to clearly define the area where you’ll be installing your fence. Use stakes and a string line to outline the path. This will ensure your fence follows your property lines and remains straight throughout the installation process. Double-check your measurements to avoid any errors.
Step 2: Digging Post Holes
Once your fence line is marked, it’s time to dig the post holes. These should typically be 2.4 meters apart, but check local regulations for exact distances. Use a post-hole digger to create holes that are 600mm deep and 200-250mm wide to ensure stability.
Step 3: Installing the Posts
Place a small amount of concrete mix at the bottom of each hole, then set the posts into place. Use a spirit level to make sure each post is perfectly vertical. Fill the surrounding space with concrete to secure the posts. Let the concrete set as per the manufacturer’s instructions before moving on to the next step.
Step 4: Attaching the Panels
With the posts in place, it’s time to install the Colorbond®panels. Start at one end of the fence line and work your way along, inserting each panel into the slots on the posts. Secure the panels using the screws or clips provided in your kit. This will keep the panels firmly in place and aligned.
Step 5: Adding Rails and Capping
For added stability, install horizontal rails at the top and bottom of the fence. These rails help maintain the alignment of the panels and prevent bowing over time. Don’t forget to add capping along the top edge for a polished finish and to protect against water ingress.
Step 6: Finishing Touches for a Flawless Finish
Take a moment to inspect the fence. Look for any gaps or misalignments and tighten the screws if necessary. If there are any scratches, touch them up with matching paint to prevent rust and keep your fence looking great.
Installing a Colorbond® fence is a fantastic way to improve the security, privacy, and aesthetic appeal of your property. With minimal maintenance required, Colorbond® offers a long-lasting solution that not only enhances the value of your home but also stands up to the toughest climate conditions. If you have
purchased a Colorbond Fence and want to install it by yourself then follow our guide for a seamless installation and enjoy your new fence for years to come!
share this
Related Articles